Thursday, January 11, 2024

Chunky Apple Yeast Bread

I love anything with apples in it.  As a matter of fact, if it's a choice... apples will beat out chocolate.  

Too bad nobody makes any of the apple desserts taste great.  It's a sign of the times.  Even good restaurants don't make their own...they order it frozen from ... somewhere..... horrible.  The last 3 times I've ordered a simple apple dessert with ice cream or whipped cream on it...the only thing I ate was a bit of topping after the first bite.  We rarely eat out, and so for me...a huge disappointment.

In my mind bread is not really a dessert...but this one could be eaten with a fork and have some ice cream or whipped cream on top .... just saying..... 

It's a bit soft; sort of like a pull apart bread.  Lots of apples.  And, a lovely soft brioche-like bread... she mentioned having it toasted...but, I think my loaf would have probably fallen apart in the toaster. 

This recipe is from a blog called Seasons and Suppers.  She has lots of lovely recipes for everything... I've tried two and so far ... a big thumbs up from me.  The other one was Easy Cream of Mushroom Soup.  Loved it.  I added a few more ingredients...and, it was so good.  It wasn't ready in the 20 minutes she claimed... but within an hour we had a delicious soup for lunch!

The recipe makes 2 loaves ... and, it made a huge mess in my kitchen .. well, it didn't ....    I did.  I had to stop in the middle to deal with lunch and, then..hurry up to keep on track and schedule..and, well ... next time it will be much easier as I know exactly what I am dealing with.  The patting and rolling out took a lot longer than I thought it would... and I used every available surface in my kitchen to make it happen.


After spreading the apples on the rectangle of dough, rolling it.. then, cutting it into pieces and then again down the centre ..you scoop up the bits and just plop them into the tins.  The egg yolk in the apples makes it pretty slippery and, the dough separates from the apples ..... and.... .... and it is a bit messy by then... but...look at this lovely rustic looking loaf...


Maple Syrup glaze...... 


If you love apples ..... this is for you !!


Monday, June 5, 2023

Greg's Pizza


Well, we call if Greg's Pizza because he used to make it for me and his family when I first met him.  He was very young then.  He still makes it, but nowadays ... it seems I get to make the dough and he is happy being the artist putting on the goodies....


 1 cup lukewarm water

 1  tsp. sugar

 1 envelope yeast (says on packet 2 1/4 tsp.)

 1  tsp. salt

 1/4  cup olive oil

 2  3/4   cups flour

 1 tin of tomato paste. (I add a bit of ketchup and some salsa to it for flavour)

Measure into bowl 1 cup lukewarm water.  Stir in 1 teaspoon sugar, then sprinkle with yeast.  Let stand 10 minutes and stir well.  Add 1 tsp. salt, 1/4 cup olive oil, 1 1/2 cups flour.  Beat until smooth then stir in additional  1  1/4 cup flour.  Knead, cover and let stand 45 minutes.  (this can all be done in a mixer) 

Press into greased pans - let rest 15 minutes.  Brush lightly with oil.  Spread tomato paste, slight Italian seasoning, then add your favourite toppings and cheese.  Stay just a bit in from the edges with the paste.

Bake for 20 - 24 minutes at 375 - 400 

Makes two pizzas (we use two large 11 x 14 pans and press it in more or less to fit).  It sort of becomes a long oval to more rectangular shape......

Click on any photo to see it bigger .....


We like to sauté onions and mushrooms before we add them... and, then... add some sliced ham or salami, and, I know it is sacrilege to some, but we like pineapple on ours... and, some sliced tomatoes (I'm crazy enough to slice the little grape tomatoes..as they always have such great flavour) and, some cheeses.  Your choice.... we usually use some Mozzarella and a bit of cheddar or some Jarlsberg ...

In this one...we even added some sliced black olives ... sautéed red peppers... 


And, then, he went back to work in the garage ... cutting something for something we must have been building....we've been renovating our house for 40 years....


Friday, May 12, 2023

Basic White Bread


 Well, that's what they call it in the Kitchen Aid mixer booklet.  Usually in the bread world, 'basic' does not contain butter, sugar and milk...  this one does......

It is the recipe I began with many years ago when I finally decided to conquer my 'yeast phobia' and go for it.  Just bake bread. 

It was amazing to me how well it turned out.  We really enjoyed it; especially for toast.  Not as much for sandwiches as it is a bit crumby compared to the store bought slices that always stay together ( one wonders what they add to it to make that happen) ... but, nevertheless... I continued to make and enjoy it. 

Until sometime in the past year...when it began to turn out ...erm...well.......just not quite the same.....

It began to come out of the oven looking perfect...but, within 20 minutes.. began to get cracking and crazing on the surface .. you could hear it ... and, much as I have read that it is what some bakers are striving for... that baker is not me.   I want a crisp, lovely brown crust..that stays firm and smooth and an interior crumb that is soft and tight with no large gaps or air holes.  

A fellow baker (Philip, thanks again).  ... .. suggested baking it at a lower temperature ..and, that worked!!  Now it is staying uncrazed or crackled on the surface... but, of course not getting quite as brown on top and, now....it is sort of settling into a dimpled, softish crust after half and hour.  Arrrghhh!@# .. 

It is still great tasting bread... we love it for toast.. by itself with coffee.....or for under a poached egg... or with soups... but, what has changed or what am I doing different or ..is it the oven?  I do have a new oven but, have had it for a couple years now ..and, I'm sure it didn't all begin with that.  Although, maybe..... 

Anyway..now another fellow baker has offered to do some 'forensic testing' on my bread and the recipe.  So, without further ado....here is the recipe Kevin.... maybe you can come up with my solution ..or ...I could always just use a different recipe and get some bread with a nicer crust.... yes... why don't I just do that?  Not... I'm just stubborn enough to keep at it until I figure it out at the very least... then..  make a different recipe!

Basic White Bread

        1/2 cup    (125 ml)  milk
3 TBSP.   (45 ml)    granulated sugar
2 tsp.       (10 ml)   salt
3  TBSP.   (45 ml)   butter
2  Packets  active dry yeast (I use 1 TBSP yeast)
1  1/2 cups (375 ml) warm water (105 to 115F).  (40C - 45C) 
5 - 6 cups all purpose flour.  (1.25L to 1.5L)

    Combine milk, sugar, salt, and butter in small saucepan.  Heat over low heat until butter melts and sugar dissolves.  Cool to lukewarm.

    Dissolve yeast in warm water in bowl.  Add lukewarm milk mixture and 4 1/2  cups flour.  Mix on speed 2 for 1 minute.  Continuing on speed 2, add remaining flour, 1/2 cup at a time, until dough clings to hook and cleans sides of bowl.  Knead on speed 2 for 2 minutes longer, or until dough is smooth and elastic,  Dough will be slightly sticky to the touch.

    Place in greased bowl, turning to grease top.  Cover, let rise in warm place until doubled in bulk, about 1 hour.

    Punch dough down and divide in half.  Shape each half into a loaf and place in a greased 8.5 x 4 x 2.5 x 2.5 inch pan (21x12x 6 cm) loaf pan.  Cover, and let rise in warm place until doubled in bulk, about 1 hour.

    Bake at 400 F (200 C) for 30 minutes.  Remove from pans immediately and cool unwire racks. 


    NOTES:::::  ~~~~~~~~~~~~~~~~~~~~~~~~~~~~~~~~~~~~~~~~~~~~~~~~~~~~~~~~~~~~~~~~~

    I decided early on that 2 packets of yeast (which each contain 2 1/4 tsps. granules) ..was too much...so I only use 1 TBSP or a bit less.   

    I have tried less butter...  less sugar ...  (usually only toss in a dollop (which is probably close to 1 TBSP of butter.. only usually use 1 TBSP or less of sugar) ....  I've tried using only water and no milk... 

    Usually I use one cup or 1 1/2 cups of whole wheat flour along with the 3  or 3 1/2 cups of white flour for my initial addition of flour...and, add 1/2 cup and a second 1/2 cup of flour until I get the consistency I feel is good.  It usually ends up a bit less than 6 cups total....

    Sometimes I knead in the machine...sometimes I just turn it out and knead by hand.... 

    Nowadays I bake it at 350F instead of the 400F they call for. ...but, next bake I think I may try 375.. to get it a bit browner..or just leave it in longer...or...  well, who knows... using milk or a bit more sugar might get a browner crust..... I'm still shocked at how pale it stays just because I began to use a lower heat for baking.

    The oven shelf is on the second from the bottom position... there are several positions I can use, but the lowest is better for breads it seems..or the top browns more quickly that the bottom.

    I have two baking settings... one called Surround (which uses a fan and upper and lower heating elements)  ..the other just Bake, which is the one I have begun to use more regularly.   I don't use steam pans or spritz any moisture on the bread or in the oven. 


    Well, there you have it Kevin... all the pertinent details.  Maybe you can figure out something that will get me the lovely crisp crust and soft interior that I used to bake with ease all those years ago and which now.... seems to evade me......


Okay, it's end of day and I'm totally bummed with the results. ...  just going to use a different recipe from now on.

The dough seemed good... nice and supple and smooth...

Click on any pic and it will show larger....


It definitely got a bit over risen in the pans... I'm always hesitant to only leave it for less than an hour ..but, in this case... I should have turned on the stove at about 40 mins and it would have been a better thing.  It was cool in the kitchen at only 20C..but, the dough was warmer I guess.  I did check it and it was above Charlie's favourite of 25C ...it was closer to 27C.. but, I thought it would be okay as the room was cooler. 

I don't know what causes it to pull like this..only on one side always... it can't be under proofed... 

...because then... I got this.  A large bubble with a very thin membrane ...which I couldn't resist pushing in ... 


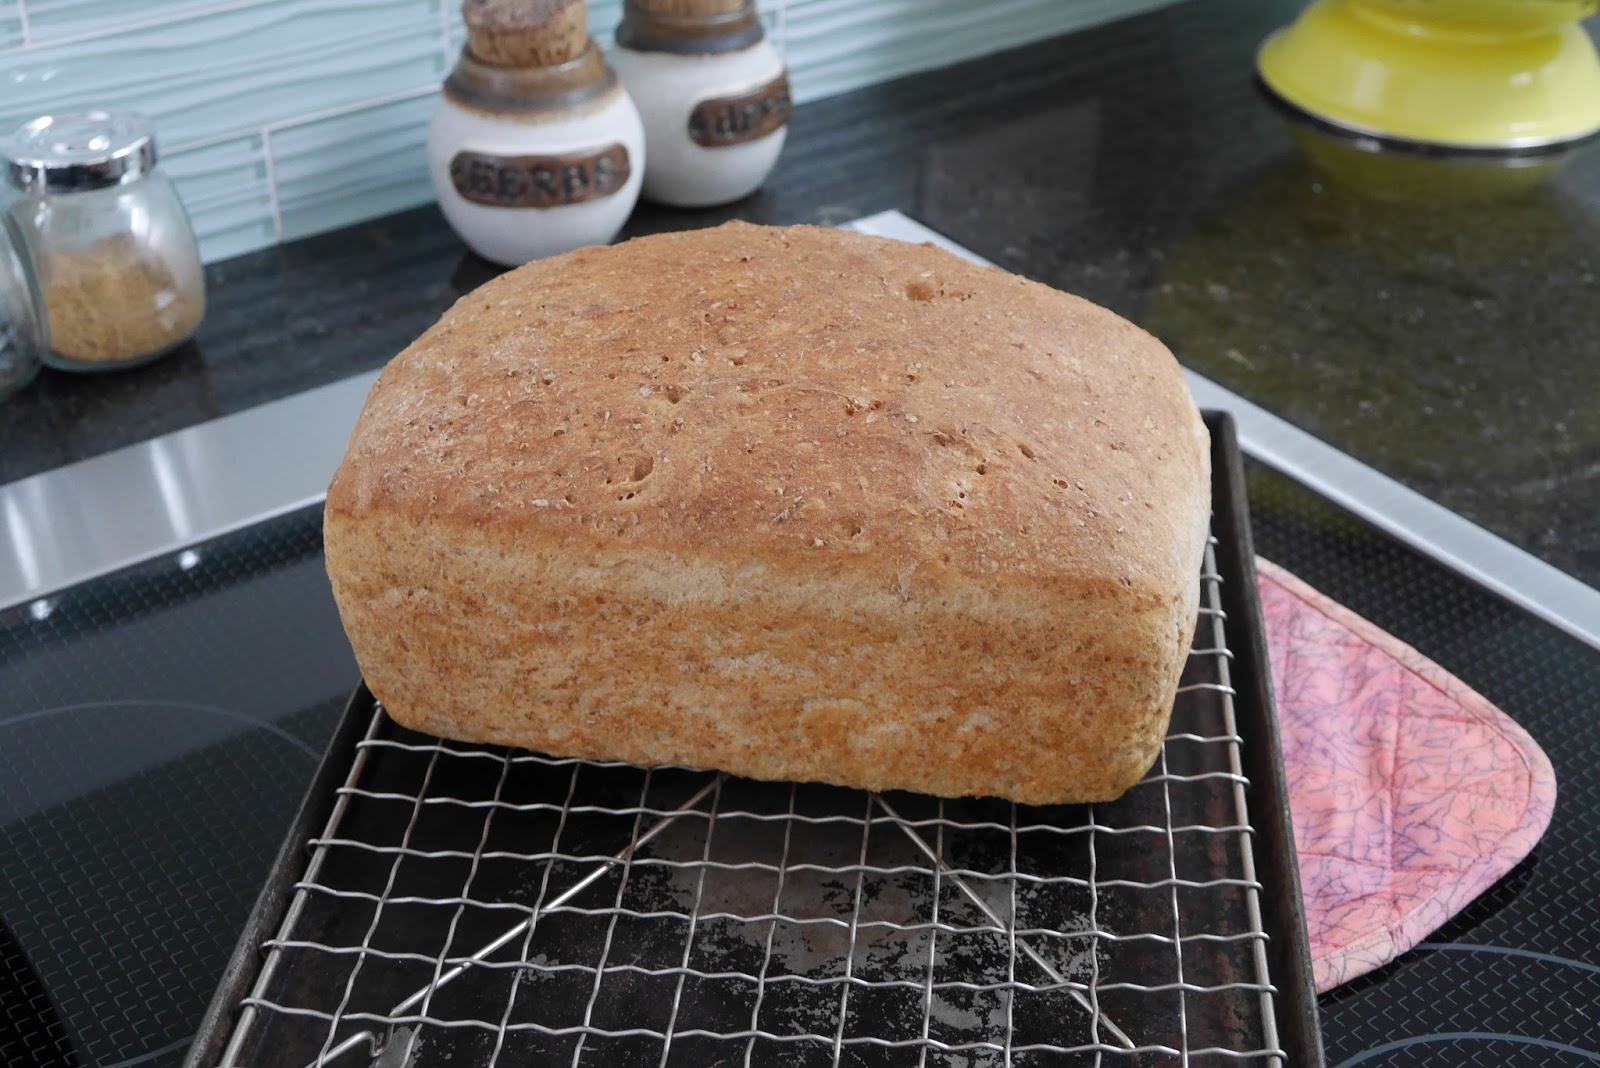
Th underside looks good... nice and golden....


A portion of the surface looks pretty darn good....


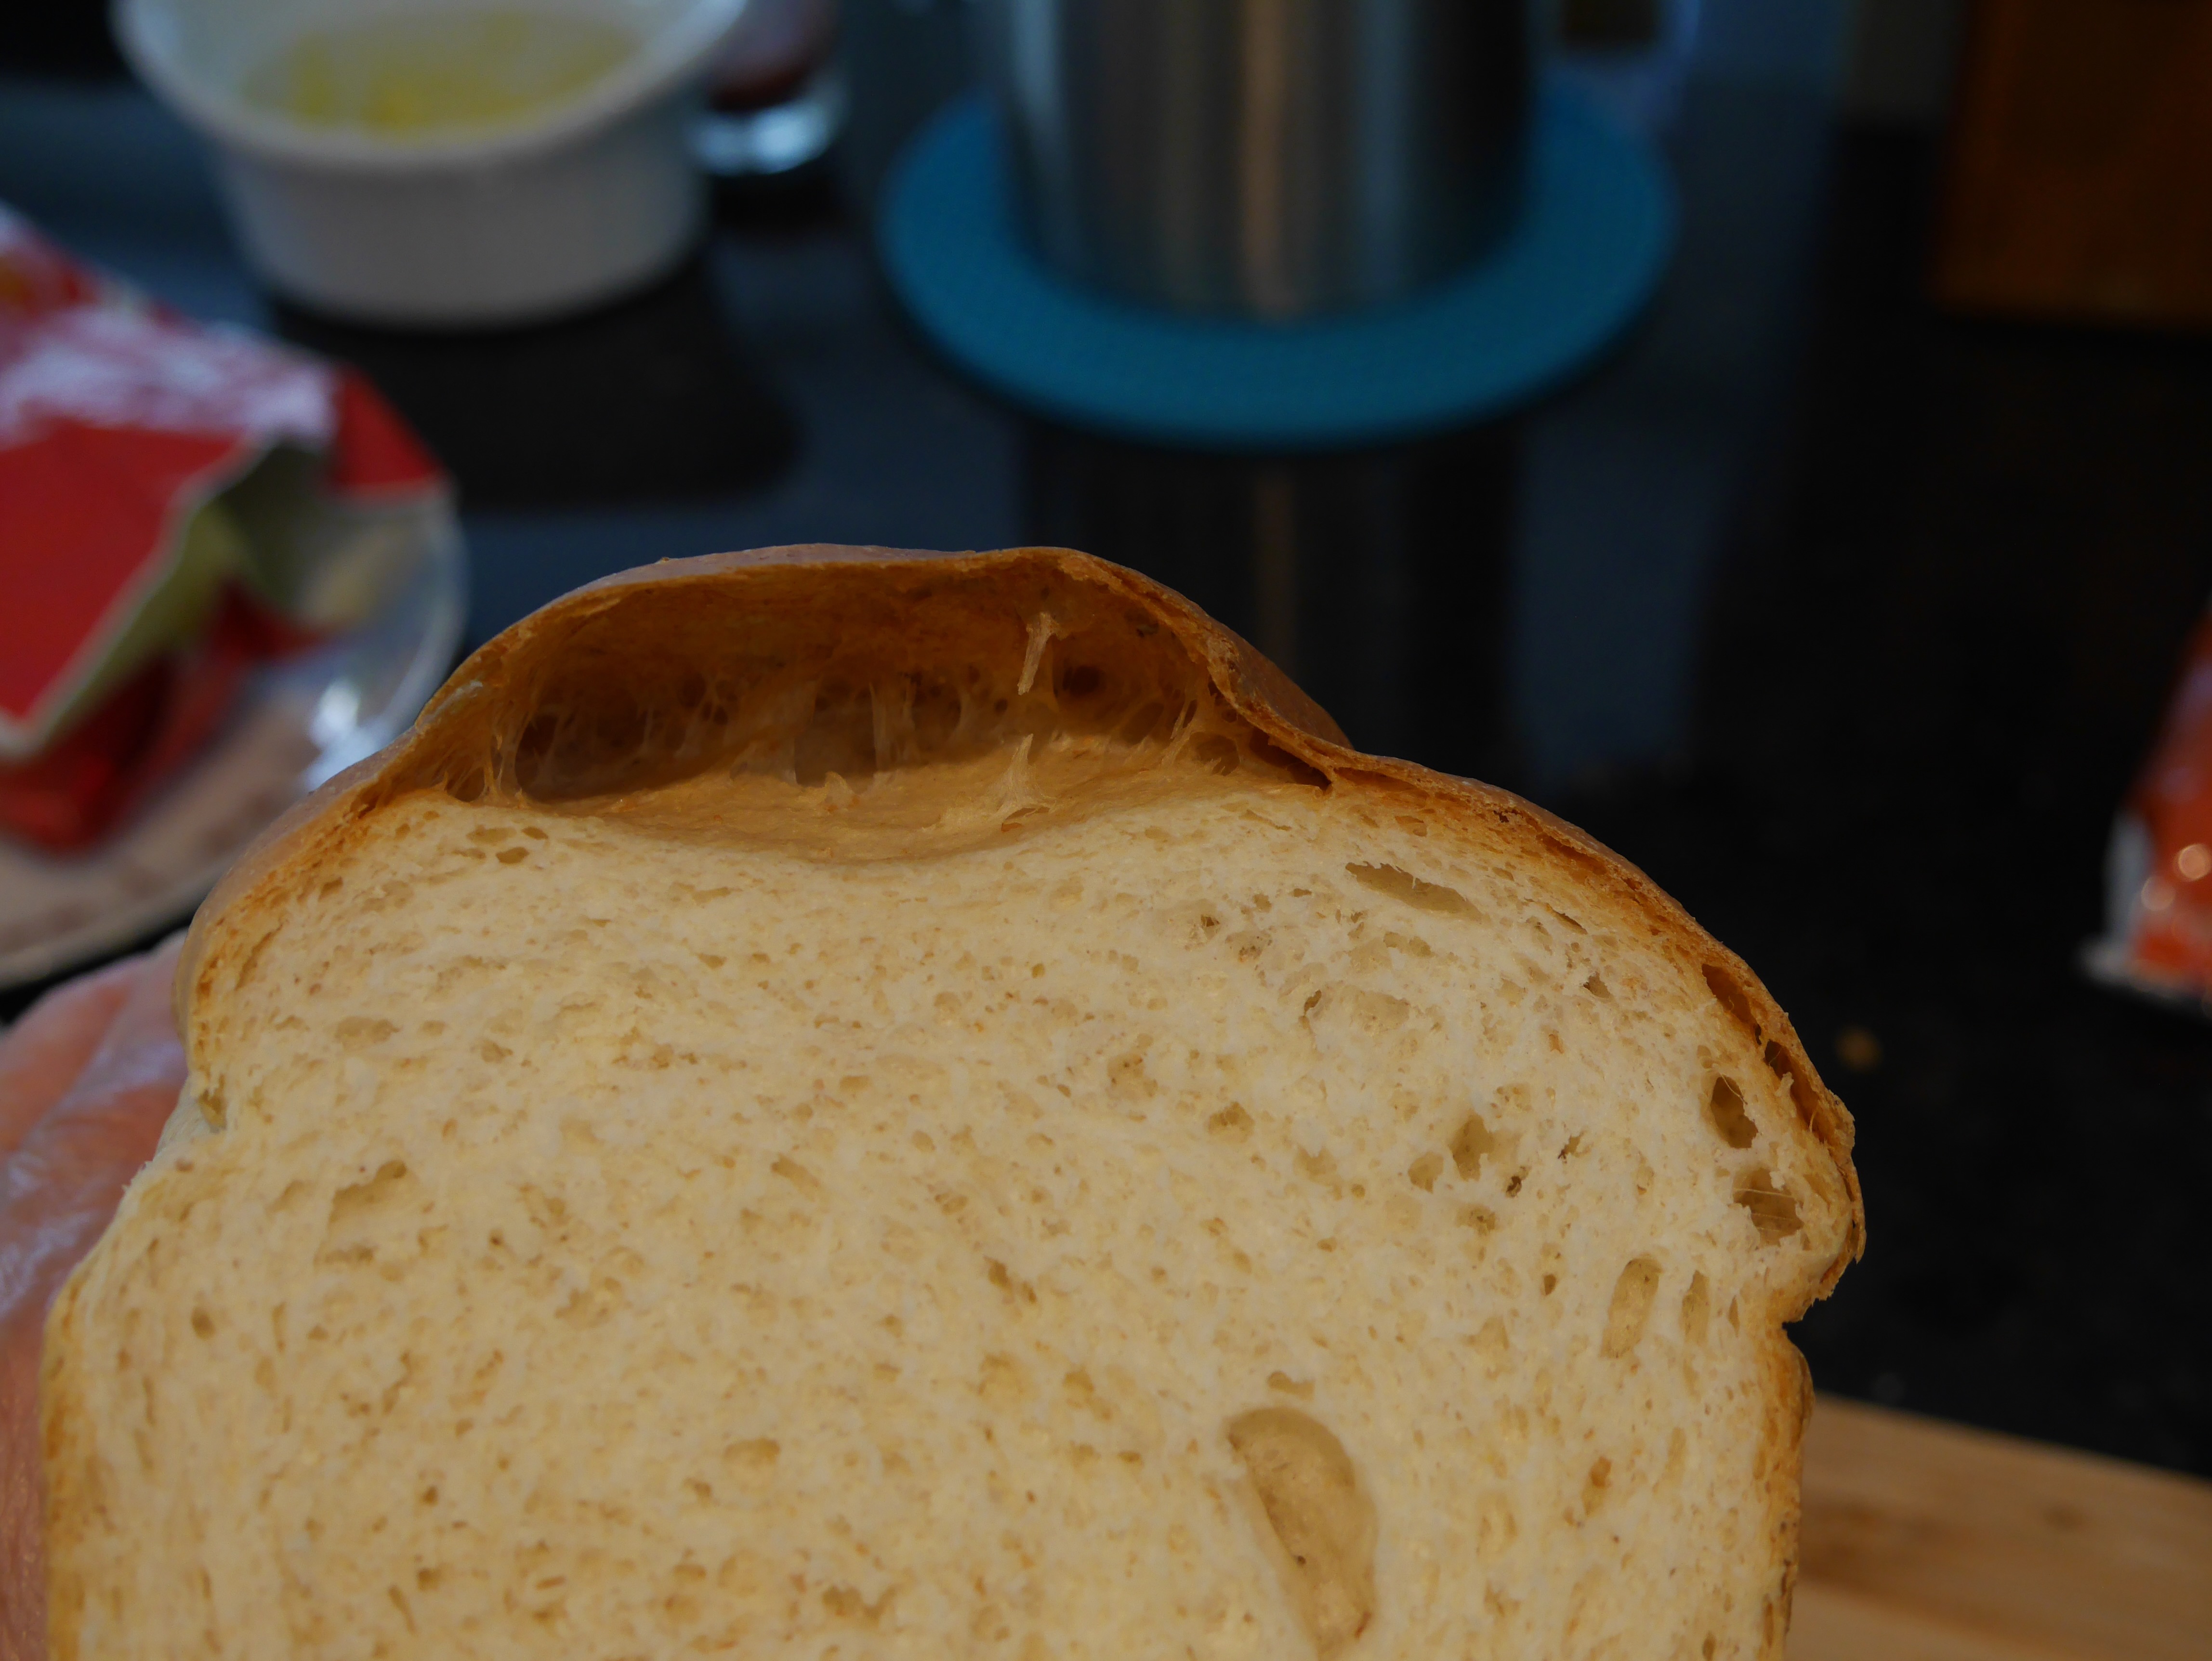
..but...once cooled ... and sliced ...look at this.  Another big bubble on the very top.


And, if you can see it ...the wrinkling or dimpling and softness I was talking about.  It may be just because it is more of an enriched dough with the butter, milk and sugar... but, who knows... 


    My husband had a slice with some butter and honey and declared it delicious.  I guess that's all that counts.... 


Wednesday, August 10, 2022

No Knead Focaccia

 I've discovered the best and easiest Focaccia ever!  No knead and it only has to rise for an hour.

Yes, there are plenty of different recipes and ways of making it...and, I have tried several, but none are as easy and as tasty as this ... so far.

Taken from Geoff's Baking Blog.. as are lots of recipes I try lately.  He makes great videos of his bakes... is straight forward and easy to follow... and, anything I have tried from his blog has turned out very well.

Geoff's Baking Blog

He has another focaccia, but it needs more rise time and I have yet to try that one... and, even queried him on whether he thinks it tastes any better than this much simpler bake.  No reply yet...but will update this when I find out.  

The recipe is on the page.. I hope you give it a try... you'll be glad you did. 

Here is the first one I made from his recipe... I put on some sliced black olives, sun dried tomatoes, grated cheddar cheese... and into the dough I mixed some sautéed onions, a few sun dried tomato bits and spices. Oooooh...it was YUMMY!  It's like a big, fat pizza by the time I get through putting on all the goodies.

Give it a click and see it BIG .....YUMM!


It puffs up perfectly and you get a big 9 x 13 inch panful of goodness.  


Saturday, March 26, 2022

Molten Orange Tarts

I tried these for the first time yesterday and my mid back is still bothering me.  They were a lot more fiddly than I thought they'd be.  As a matter of fact, Geoff, from whose site I got them, referred to them as"Easy"on the recipe.  He's a better man than I....... although, it didn't look that hard on his video.  He called them Gooey Orange Tarts..but, I don't really like the word 'gooey'.... so, I call them Molten instead.  There is just enough orange sauce inside them to let it gently slip down onto the plate if you cut one in half.  If you put too much into the shell it will just bubble up and over the sides...don't be tempted to do that.   There was plenty of sauce left over so I just heat some when we eat a tart..and spoon a little bit on top as well.  

Anyway... the crust is firm when baked, but still not tough if you know what I mean.  It is like the crust on fruit tarts.  It has a lovely flavour and you notice a hint of orange from the zest... which is strange as I thought the zest from two whole, very big oranges would be too much.  It wasn't.  It is perfect.  

Further info and thoughts...::: I think the chunk of dough for making the little topping balls should be kept in one big chunk and covered 'til you are ready to roll out the balls, otherwise it begins to feel a bit dry in spite of the fact that it is really oily.. quite weird.  And, mine did feel a bit grainy I think.. probably because I used granulated sugar when it called for caster sugar.  Next time.... and, there must be a next time as they are wonderful to eat!  So, I will have a better idea of what can happen...and will have more paper towels at the ready for my very greasy hands and will put the pot of orange sauce ingredients on the front burner of the stove ... also... the amount of sauce is overly generous for only 9 tarts.  A bit less would be fine.  I'll have to work out the measurements for a closer amount. 

Without further ado...here is Geoff's recipe.  

Geoff's Orange Tarts

Here is the original Youtube where Geoff got his idea for these tarts.

Ricette Fatte in Casa

Photo of my very cute finished tarts.


I got tired of trying to make perfect little balls so I tried one with just crumbles of the dough...it looks very nice as well.  Not quite as cute, but easily as acceptable and of course, just as delicious! 


......... making the 72 (or thereabouts) tiny balls..... which as you know...I didn't........  

Here is one with some extra orange sauce spooned over .... 


Saturday, February 26, 2022

Geoff's Pumpkin Streusel Muffins

 First, a photo of Radcliffe.... with one of these lovely muffins. Okay... something has changed on Blogger and my post page and it's very difficult to do what I planned. Hang on...

Geoff's Baking Blog

Pumpkin Streusel Muffins

Here is the link to Geoff's site and the original recipe....  and here is Radcliffe showing you what they look like..... mmm.... yummy......


Wednesday, September 4, 2019

Plum Loaf

Every year at this time is the only time I see the small Italian or prune plums in the stores.  So, I bake several of the loaves we love so much.

Italian Prune Nut Bread
1 cup butter
2 cups sugar
1 teaspoon vanilla
4 eggs
3 cups flour
1 teaspoon salt ( I never use it because I used salted butter)
1 teaspoon cream of tartar
1 teaspoon cinnamon
1/2 teaspoon baking soda
3/4 cup sour cream (I used fat free yogurt)
2 teaspoons grated orange peel
2 cups Italian prunes, pitted and chopped in 1/2 inch pieces.
1 cup chopped nuts

Cream butter, sugar and vanilla until fluffy.
Add eggs, one at a time, beating well after each addition.
Combine flour, salt, cream of tartar, cinnamon and baking soda.
Blend sour cream and orange peel...
.. add to creamed mixture alternately with dry ingredients.
Stir til blended.
Add prunes and nuts; mix well.
Divide between two greased loaf pans (9x5x3).
Bake at 350F for 50-55 minutes
.... or until tooth pick inserted in centre comes out clean.
Cool 10 mins. in pan
Remove from pan and cool thoroughly on rack.

............ options .... I added a bit of ginger, all spice and nutmeg to the cinnamon. Be careful with nutmeg and all spice..just a tiny "sprink" goes a long way! The nuts in mine were walnuts and I lightly toasted them before chopping. I halved the recipe for my test loaf.... but it was so good I will be making more right away. Double wrapping with foil and plastic keeps loaves as fresh as the day you bake them. Just thaw and enjoy later. Last week I sliced an egg nog loaf from Christmas baking..... perfect for a surprise treat at tea time ...


Thursday, June 27, 2019

My bread got "over riz" ...

Hahahhaha.....   I laughed my head off when I saw this about 3 hours after I put it into the bowl to rise... it was only supposed to do that for 1 to 1 and a 1/2 hours or so... but, things got busy and I forgot.  But, still.......


It pushed the plastic wrap and the towel on top out of the way and broke over the top of the bowl...my biggest bowl unless I step up to the big ol' metal bowl...

This particular recipe is one I have used for years.  But in the last two batches .... I have had to add lots more flour than usual to the 2 cups of water... even to get it to a stage where it is not really sticky... maybe because it has been really rainy or something?   We do know that breads are finicky that way... and by the time I weighed out the two loaves I discovered that they were in the 720 gram range versus the 560 to 580 gram version of all the times past.  This is silly.

They really were too big for the regular size loaf pans which are only 8 x 4 inches.  This time...I tried to sort of divvy them up into one of the regular size pans and one quite large pan which is 9 x 5.   It worked...sorta.... but, then, I was kind of waiting for the large one to rise a bit more and so the smaller one got "over riz" again..hahah.... and now I have one lop sided loaf and one good loaf.


See where the smaller one is poofed out on the side?  But, who cares??   Paul Hollywood is not judging my bread.  They taste really good as usual... and, if they don't fit in the toaster., too bad.  I'll just cut them in half.  Especially the BIG one... that one won't fit the toaster...

 They don't look that different in some photos and the big one doesn't even look that big ... I should have put it beside the toaster for better perspective.  Next time.


Tuesday, February 5, 2019

Miniature Gingerbread Houses (take two)

copied this from my other blog.  (It's from Christmas day
really)
Can't do much else...broke my wrist and arm but wanted to
 get it on here.
You can find her recipe for the lovely gingerbread online.
~~~~~~~~~~~~~~~~~~~~~~~~~~~~~~~~~~~~~~~~~~~~~~~~~~~~~~~~~~~~~~

I say "take two" because it is only the second time to try
Royal Icing and piping skills... hahaha... skills... that's
a laugh!

This time I made the icing softer ... with many more
tablespoons of water than Jemma suggests ...and still
 ... way too stiff to pipe.  So, after a lot of moaning,
whining and wiping off about 17 doorways... and, then
some swearing... I put the icing back in the bowl and
added more water yet. By then, I'm sure there were
dried crusty bits in it as well.

I tried again... but, by then, my hand was wobbly and
I was totally ticked.  Mister BumbleVee said he would
give one a try.  I managed to make only about two end
pieces... not great windows and doors...and his first one
was a bit wobbly too... but, then...he became a piping
machine!  He did all the rest of the pieces. In total I had
8 houses, and at 6 per house that was a grand total of 48
pieces.. a lot of fiddly piping!

But, hours later, in spite of the silly icing never being the
right consistency... he had managed to do all the pieces.
I waited til they were dry and assembled and added more
"snow" ... which after awhile... became a bit messy too
because my parchment bag was practically trashed.
I only had one piping tip and bag so made a couple of
parchment ones;  well, Mr. BV did that too...  hahahah
... BUT... we did 'em, the little buggers!!

Since then, I have been watching many, many videos on
piping, icing consistency, tricks and tips etc.... and, man
are some of those women ever amazing!!  I love one of
them named Haniela... she does great stuff..and has lots
of info to take in.  I will have to watch them again and
then, make up another batch of icing and get busy
practising on some parchment or something.  By next
year I want my little gingerbread guys to look somewhat
better than these.. but, I am showing them anyway...
because darn it ...I am proud of our efforts.

Mr. BumbleVee says .. "don't show everybody our
amateurish efforts".. but, I think they are cute and also..
it is only the second time trying anything like this at all
and his first time doing the solo piping, so .. here goes....

The worst ones, with no door sills... are mine.  The good
ones are Greg's...I think he is pretty good at this.....
maybe I need to make him watch the videos and he can
do them again next year.   Don't tell him I said that.


I like to encourage people to give things a try even if you
have never done it before .. who knows how it will turn out?
You may be quite surprised at how good you are...
You may have amazing beginner's luck...

Try something new for the New Year!


Tuesday, May 8, 2018

I love Barm Brack

A moist, fruity loaf with Irish origins.

Every time I bake it;  a bit different.  What if I don't have something on hand? ...well, make do with something else of course ..   ..

I used to put less fruit in it I'm sure...but nowadays? ...I add apricot, cranberries, fruit peel if I have it...maybe even a cherry or two.. candied ginger... whatever I feel like.  Lots of fruit now.

Last time I made it I even put a splash of Brandy in the tea for soaking the fruit overnight...and orange zest, of course...and, some orange juice.  Man...it tastes like an orange creamsicle some days....mmm....  love it.

Here's a pic of the latest loaf...so moist and so tasty.  Link to the recipe.


Monday, April 30, 2018

Mary Berry's Jaffa Cakes

It is so annoying when you can't find out for certain how some of the recipes are actually done.  Yes, you can always find out some of it...but, the fine details....not always.

Like, ..... how on earth do you get the chocolate on the top to look like Mary's?  It doesn't tell you other than to say you can spoon it on if you don't want to go to the trouble of getting it perfect.  Huh? Why the heck doesn't she say how she does it and let me make up my mind later as to whether I will do it her way or not?

Here is a pic of hers.... from the Great British Bake Off show... see how lovely the chocolate line is all around the little cake.  Note the great criss cross pattern they say should be there ... I've never seen a store bought version so don't really know what one should look like.  

To me, they almost look like they have been dipped in the chocolate...but, it hardly seems possible as the cake is quite flat and how would you grab the bottom and keep your fingers out of the chocolate? ..maybe a couple of skewers through the bottom of the cake? .. some other method? .. who knows?......  ...... anybody got any suggestions?                                                                

Then, there are dozens of folks who have made them and put them out there ... and, most of them look like this.  I would probably be too embarrassed to show mine if they looked like this...  although, I might...  just to let you know if they were that difficult to do.  There has to be a better way to get the chocolate on there and make it look tidy at the very least. 


I want to try Jaffa cakes some day soon... and want them to look nice.  


Tuesday, April 24, 2018

Alexandra's Mom's No Knead Peasant Bread (revisited)

A little over a year ago I posted about this amazing bread... nobody ever commented...but, I had hundreds of people who came to view the post.

Do you ever wonder why nobody comments?  Do you wonder, like me, if they ever try the recipe?   I wonder how they like the bread?  So many questions....

I make it all the time.  I love this bread.  I do it a bit differently now and thought I would show you a series of pics of my efforts.

The first few times I made it I used only white flour...now it is more like half and half whole wheat and white...with a good sprinkling of wheat bran tossed over it as well.  About 1/4 of a cup or so.

It is a very forgiving dough.. I have forgotten it in the microwave for a couple of hours...no problemo.

Anyway... check out Alexandra's blog to find out more about her Mom's bread.. and, please give it a try.  Also... she now has a book out.... in which the bread figures big time.  There is even a gluten free version that is pretty darn good.

https://alexandracooks.com/2012/11/07/my-mothers-peasant-bread-the-best-easiest-bread-you-will-ever-make/

Click on any pic to see it larger and get a better idea what I am talking about.

When first you pour over the foamed yeast and water you think....too much liquid.


Then, you mix a bit and think... oh, no... too little liquid!


Finally it all comes off the sides of the bowl and comes together beautifully and you sigh with relief.


I like to put mine in the microwave.  A warm and cozy spot.. almost like a proofing drawer.


An hour or so ...or even 3 hours later if you forget ...it looks like this... at least twice the size.


Fold it in on itself with a fork... scraping it all from the sides of the bowl towards the centre.


I roll mine into an elongated blob that is close to the size of my tin.


Turn it out into a 9 x 5 x 3 tin.


Let rise in a cool spot this time.  Looks like this after about 20 or so minutes.


Bake in 425F oven for 18 minutes, turn down to 375F and bake another 18 or so....


Looks like this... and, yes I slice it hot from the oven..slather it with butter and some honey.  YUM!