Showing posts with label breads. Show all posts

Thursday, June 27, 2019

My bread got "over riz" ...

Hahahhaha.....   I laughed my head off when I saw this about 3 hours after I put it into the bowl to rise... it was only supposed to do that for 1 to 1 and a 1/2 hours or so... but, things got busy and I forgot.  But, still.......


It pushed the plastic wrap and the towel on top out of the way and broke over the top of the bowl...my biggest bowl unless I step up to the big ol' metal bowl...

This particular recipe is one I have used for years.  But in the last two batches .... I have had to add lots more flour than usual to the 2 cups of water... even to get it to a stage where it is not really sticky... maybe because it has been really rainy or something?   We do know that breads are finicky that way... and by the time I weighed out the two loaves I discovered that they were in the 720 gram range versus the 560 to 580 gram version of all the times past.  This is silly.

They really were too big for the regular size loaf pans which are only 8 x 4 inches.  This time...I tried to sort of divvy them up into one of the regular size pans and one quite large pan which is 9 x 5.   It worked...sorta.... but, then, I was kind of waiting for the large one to rise a bit more and so the smaller one got "over riz" again..hahah.... and now I have one lop sided loaf and one good loaf.


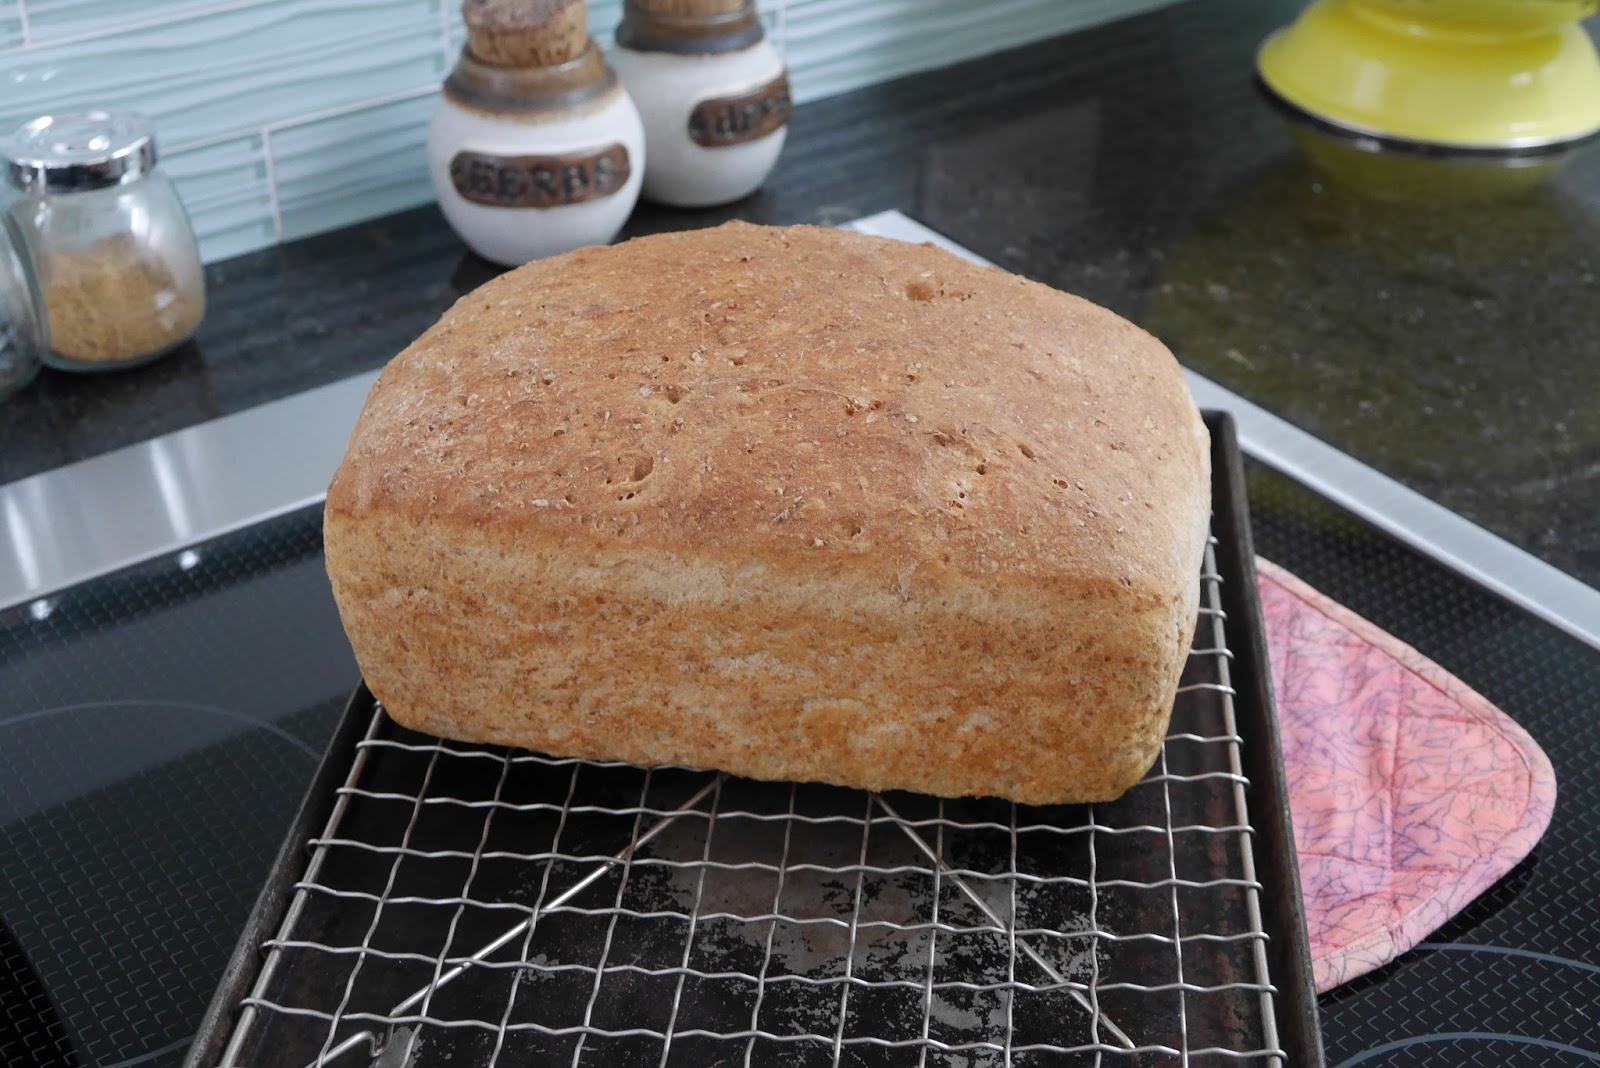
See where the smaller one is poofed out on the side?  But, who cares??   Paul Hollywood is not judging my bread.  They taste really good as usual... and, if they don't fit in the toaster., too bad.  I'll just cut them in half.  Especially the BIG one... that one won't fit the toaster...

 They don't look that different in some photos and the big one doesn't even look that big ... I should have put it beside the toaster for better perspective.  Next time.


Tuesday, April 24, 2018

Alexandra's Mom's No Knead Peasant Bread (revisited)

A little over a year ago I posted about this amazing bread... nobody ever commented...but, I had hundreds of people who came to view the post.

Do you ever wonder why nobody comments?  Do you wonder, like me, if they ever try the recipe?   I wonder how they like the bread?  So many questions....

I make it all the time.  I love this bread.  I do it a bit differently now and thought I would show you a series of pics of my efforts.

The first few times I made it I used only white flour...now it is more like half and half whole wheat and white...with a good sprinkling of wheat bran tossed over it as well.  About 1/4 of a cup or so.

It is a very forgiving dough.. I have forgotten it in the microwave for a couple of hours...no problemo.

Anyway... check out Alexandra's blog to find out more about her Mom's bread.. and, please give it a try.  Also... she now has a book out.... in which the bread figures big time.  There is even a gluten free version that is pretty darn good.

https://alexandracooks.com/2012/11/07/my-mothers-peasant-bread-the-best-easiest-bread-you-will-ever-make/

Click on any pic to see it larger and get a better idea what I am talking about.

When first you pour over the foamed yeast and water you think....too much liquid.


Then, you mix a bit and think... oh, no... too little liquid!


Finally it all comes off the sides of the bowl and comes together beautifully and you sigh with relief.


I like to put mine in the microwave.  A warm and cozy spot.. almost like a proofing drawer.


An hour or so ...or even 3 hours later if you forget ...it looks like this... at least twice the size.


Fold it in on itself with a fork... scraping it all from the sides of the bowl towards the centre.


I roll mine into an elongated blob that is close to the size of my tin.


Turn it out into a 9 x 5 x 3 tin.


Let rise in a cool spot this time.  Looks like this after about 20 or so minutes.


Bake in 425F oven for 18 minutes, turn down to 375F and bake another 18 or so....


Looks like this... and, yes I slice it hot from the oven..slather it with butter and some honey.  YUM!


Monday, May 19, 2014

Mountain Bread

...or Mountain Man Bread ...

My brother bakes it; sent me the recipe.  He's a true mountain man living in the middle of nowhere (in the mountains)  ... hunting, fishing and baking ... feeding the wildlife and taking lots of pictures.  He also makes a special orange loaf, and a mean cherry pie, let me tell ya... but, back to his bread....

If you use a 9 x 5 loaf pan it will hold the dough, but, it does make a gargantuan loaf... sometimes too big for my toaster.. so I cut the slices in half ...or bake them in smaller pans and get two small loaves instead of one huge loaf.  Your choice.  But, please give it a try!


Multigrain Bread

1 TBSP  (15 ml) granulated sugar
1 - 1 1/2 cups (375 ml)  warm water
1 pkg (2 1/2 tsp/11ml) active dry yeast
1  cup (250 ml)whole wheat flour
2  TBSP (25 ml)fancy molasses  ((I only use 1 TBSP))
2 TBSP (25ml) butter melted
1 tsp. (5 ml) salt
1/4 cup (50ml) shelled sunflower seeds
2  TBSP (25ml) flax seeds
2/3  cup (150 ml) rolled oats (not instant)
3 cups  (750 ml) all purpose flour (approx.)

In bowl, dissolve 1 tsp (5 ml) of sugar in 1/2 cup (125 ml) of the warm water; sprinkle in yeast.  Whisk in 1/4 cup (50ml) of the whole wheat flour; set in warm place til bubbly, about 10 minutes.

In large bowl, combine molasses, butter, salt and remaining sugar and warm water.  Sir in sunflower seeds, flaxseeds, yeast mixture and 1/2 cup (125 ml) of rolled oats.   Stir in remaining whole wheat flour and enough all purpose flour to make stiff dough.

Turn out onto lightly floured surface; knead until smooth and elastic, kneading in as much of remaining all purpose flour as necessary, about 10 minutes.

Place in large greased bowl, turning to grease all over.  Cover with plastic wrap or towel; let rise in warm draft free place until doubled in bulk, about 2 hours.

Punch down dough; turn out onto lightly floured surface.  With rolling pin, flatten into 11 x 8 inch rectangle; firmly roll up into log and pinch seam to seal.  Or, shape into loaf log with hands and fit into pan.  Cover and let rise until doubled in bulk, about 1 1/2 hours.

With tip of sharp knife, make 1/2 inch deep slash lengthwise down centre of loaf.  Brush top with water and sprinkle with remaining oats.   In conventional oven bake at 400F (200) for 30 minutes.

For convection oven bake in centre at 350F (180 C)about 40 minutes.   When done, bottom of loaf sounds hollow when tapped.

Remove from pan; let cool on rack.


Options:::::  If you are used to baking, you will find easier ways to do the mixing and also add and subtract seeds and nuts as you prefer.

 I usually make mine in my stand mixer.  So, I put some warm water and sprinkle yeast over it in the mixer bowl ... wait for yeast to froth (about 10 minutes) and then add other ingredients, beginning with the wet ingredients and then, the flours, nuts and seeds.   Run mixer with dough hook til dough clears sides of bowl and then, take the lump of still slightly sticky dough out and knead for some more minutes on floured surface adding a bit more flour til I get a silky and just non sticky mass..  then put in greased bowl for first rise.

I don't bother slashing the top or adding oats to it...they usually just fall off and make a mess on the oven bottom ... also, I only use one TBSP of molasses ..it is too much for my taste if I use the recommended two TBSP...

.... and, if I don't have enough sunflower seeds or no flax around... I just leave them out or add some more of the other .... it's a pretty forgiving loaf....and, very tasty.  Some day I'm going to try stuffing chunks of hard cheese inside of it....


Has a lovely rustic look to it.


It makes the best toast!


Thursday, February 21, 2013

Stromboli

I have no idea why it is called that.  Just a minute. Must check it out ... I'll go ask Professor Google and see if it is a regular name for this type of bread.


Oh, sorry...just ran off to check it out and Wiki says this about it. ....  And, as usual... the Americans are claiming they invented it.  Okay then.....

I found the recipe in one of my bread books.... and, added a few things they didn't ...subtracted a bit of the cheese... and now wish I had mixed it more like they suggested.   Next time.

I may have added a bit more flour than they asked for or mixed it a bit too much...either way.... I didn't like the firmness of the crust, although, the interior is lovely and soft.  And, in retrospect, wish it had more cheese and less olives.... again, next time.  The photo in my book looks softer and it seemed flatter ...

There are lots of recipes online if you would like to give it a try.  I won't be adding my own recipe here til I have attempted it a second time and appreciate the crust a bit more.   But, how about this? ... Why doesn't somebody else give a Stromboli a try and let me know if their recipe is better or ..much the same....  ??


Saturday, May 28, 2011

Broa..... or Portuguese Corn Bread ....

...or, at the very least...a super close second!! That's what I'm calling my third recipe of this yeasted corn bread I've tried since coming back from our Portugal holiday.  How do you like my cute little handpainted souvenir serving plate?
Probably won't taste that wonderful bread again 'til I go back, and even then...'til I find that very same market in the very same town and hopefully the very same person will have baked it!  As if, hey?  A girl can dream........


Meantime.......... I'll definitely continue to slightly tweak this particular recipe..because...so far, it is the best one I've tried ( the easiest too for that matter) and I'm convinced it would just need a few tiny changes to be right there!  You know how your taste buds remember things.... mine do anyway.... and I'd really like to replicate that wonderful flavour if possible.
I loved the colour of this loaf.... as yellow as bananas.....whereas some are greyish yellow.... or dull colours....


Maybe for you this could be a great cornbread for a first time effort ....and maybe it will be your new favourite ...


The Portuguese like to eat this bread with their favourite soup,  Caldo Verde, or, green soup.

Check out what Wiki has to say about the soup.  It's basic ingredients:  kale and potatoes.... but, as with all recipes... now has dozens of variations. Lots with their favourite sausage in it too ... Chorico..or Chorizo.  Google it for lots of info and recipes .... it's always amazing to me how many recipes there are for things I've previously never heard of.  And...now... I've already made several very tasty soups in the Caldo Verde style.

I'll post my own variation of Caldo Verde soon too..... but, for now.... Broa.  Funny how I remember the food words I learned in Portuguese isn't it?  ....  hahhaha.... now how to ask for the bathroom..... oh, yes..just a minute....actually... that seems universal in European countries...just ask for the WC and you will be fine...even if you can't speak a word of the language.

This recipe is from a wonderful breads book given to me by a blogger named Lewis...in a very amazing pay-it-forward that I offered to do on his blog a few years back.  I credit him with getting me started with bread baking.  Thanks so much again Lewis.  I wish you were still blogging.  Miss you and your great recipes and tips.


Broa

2   tsp. dry yeast
1/2  plus 2 TBSP lukewarm milk
3/4  cup lukewarm water
1 1/4  cup yellow cornmeal
2 1/4  cup bread flour, sifted  (I just used regular flour, unbleached... )
1 1/2  tsp. salt  (I only used 1 tsp.)
1  TBSP olive oil

Sprinkle the yeast into the milk in a bowl.  Let stand for 5 minutes; stir with a wooden spoon.  Add the water to the milk.  Mix the cornmeal, flour and salt in a large bowl.  Make a well in the center and pour in the dissolved yeast and olive oil.

Mix in the flour to form a firm and moist, but not sticky dough that leaves the sides of the bowl.

Turn the dough out onto a lightly floured work surface.  Knead the dough until smooth and elastic, about 10 minutes.  Put the dough in a clean bowl and cover with a dish towel.  Let rise until doubled in size, about 1 1/2 hours.  Punch down, then let rest for 10 minutes.

Shape into a round loaf.  (If you have trouble doing this...just Google how to do it...there are several videos to see)   Place on a baking sheet sprinkled with cornmeal (just a very light sprinkling is fine) and cover with a dish towel.  Proof until doubled in size, about 1 hour.

Dust the loaf with cornmeal. (I omit this step now...it just falls off later with I am cutting and it is messy).... Bake in a preheated oven for 45 minutes, until golden and hollow sounding when tapped underneath.  Cool on a wire rack.

::: I just used regular flour because I didn't have any bread flour on hand.  Also...I added 3 TBSP of sugar as I was trying to get a slightly sweet taste that I remember a certain loaf having...... still not enough really...but, almost....
Also....I mixed my ingredients in my stand mixer because I am suffering with a rib problem... can't do anything like mixing or kneading at the moment.  And...one more thing...I left it a few extra minutes...because I definitely wanted my crust to be darker than golden.  This was perfect for me.

We had it with a great Caldo Verde....I like my dipping breads toasted...it is YUM toasted.....I sure hope you give it a try.

Thursday, February 10, 2011

Focaccia


I have a book titled simply,"Bread".  Eric Treuille and Ursula Ferrigno.  They come from France and Italy... they know bread! I love this book.  All sorts of information about bread baking at the front...and then... a great series of recipes with pictures.  Perfect for knowing exactly what things should look like and how to do it.

This one is called Focaccia Farcita and it says it is a "filled Italian hearth bread".  It says focaccia comes from the Latin word focus which means "hearth" and traditionally, the embers of the hearth are where focaccia was baked.  They refer to it as a moveable feast because of the fillings and toppings which can be used.  You can use anything you like really...as long as it cooks in the same amount of time the bread takes to bake..or... partially cook veggies before adding them if you like.

Focaccia Farcita
2  tsp. dry yeast
1  1/4  cups water
3  1/4 cups bread flour (I used all purpose)
3  tbsp olive oil

for filling and topping
1/2  cup crumbled Gorgonzola  ( use what you like )
7   oz. mozzarella, sliced
1  handful of basil leaves  (I just used some dried basil and oregano)
1/2  tsp coarse salt
2  tbsp fresh rosemary leaves... (I only had dried and just used a sprinkle)
4  tbsp olive oil

Sprinkle the yeast into 1 cup of the water in a bowl. (I always use 100F water so it doesn't kill my yeast) Let stand for 5 minutes; stir to dissolve.  Mix the flour and salt in a large bowl.  Make a well in the center of the flour and pour in the dissolved yeast and the oil.

Mix in the flour.  Stir in the remaining water to form a soft, sticky dough.  Add more water 1 tbsp. at a time if needed.

Turn the dough out onto a lightly floured work surface.  Knead until smooth, silky, and elastic, about 10 minutes.

Put the dough in an oiled bowl and cover with a dish towel.  Let rise until doubled in size, about 1 1/2 to 2 hours.  Punch down and divide the dough into two equal pieces.  Chafe for 5 minutes... then let rest for 10 minutes. (it just means forming dough into balls by cupping your hands gently around the piece and applying light downward pressure while rotating the dough in a steady clockwise motion til a nice even round shape is formed).

To make the filling.
Roll out each piece of dough into a 9 1/2 inch round.  Place one round on an oiled baking sheet.  Arrange the two cheeses and basil (or whatever else you decide to use) over the top, then seal in the filling using the second round. Leave a little space around edge for sealing. Gently pinch the edges of the dough together with your fingers.

Cover the dough loosely with a dish towel.  Proof until doubled in size, about 30 minutes.

Use your fingertips to gently press into the surface of the dough to form dimples about 1/2 inch deep.  Sprinkle with the coarse salt, rosemary leaves and 1 tbsp of the olive oil. (I found this coarse salt just wayyyy too salty for us... so won't bother with this step next time... your call.)

(looks like a moonscape)...


Bake in preheated oven for 30 -  45 minutes, until golden.  Drizzle immediately with remaining olive oil, and serve warm.

optional..... I used some black olives and sun dried tomatoes in mine.... mmmmm...   it also talks about roasting cherry tomatoes and using those.... sky is the limit with our "moveable feasts" and focaccia ..


Thursday, November 18, 2010

Ranch bread...

I got the recipe from Carson's 7MSN Ranch... so I'm calling it Ranch Bread when I write up the very simple recipe.

She blogged about it here ...and here . I made some the other day along with several of her followers.  I kind of snickered when some of them mentioned making mistakes...because really, it is so simple, who could do that? Check there for the actual ingredients and measurements as well as her "how to"...

Well...I made a little boo boo too that could have been soooo much worse than it was. Thankfully I like to watch any of my breads for the first few minutes.  You know ...just because it's such fun to see how it begins to rise immediately.  Thank goodness I did peek in there... because I left plastic wrap on the dough!!  Aacckkk!!. what a stupid thing to do!


I whipped open the oven door and tore off the wrap... taking some dough with it and leaving a few little peaks on top of one loaf.  Who cares?  I was just happy it didn't melt totally and burn and make a helluva mess.  The oven was at 425 F....methinks it soon would've been a major disaster.

This bread is an easy no knead loaf... and like all good rustic, artisan loaves ..has lots of lovely air pockets.... it's supposed to.

One day....mix up the ingredients.... cover it with that dreaded plastic wrap...and leave it for about 18 - 24 hours on your counter top.  I was a bit worried that perhaps my bowl was a bit small..but, no..it stopped at a few inches from the top.


next day it looks like this..... lots of tiny air bubbles... and quite sticky...


Gently scrape it out of the bowl onto a well floured surface... and, as Linda says... lift it skyward with a spatula a few times.  Gently form it into a loaf with hands well floured... or two smaller ones...and let it rest while the oven is heating.  Here was where I caused my own problem...I put that stupid plastic wrap back on top of my loaves while they were resting, and then... didn't even notice it and slid the loaves into the oven.  DON'T DO THAT.
As Mr. BV said...why didn't you use a tea towel like you do all the other times with bread? At least you would have noticed that.
D'uuhhh .... who knows? ...


See my little spiky thingies? ... caused from ripping off the plastic wrap.


Here's the perfect one.


and.... even more perfect hot with butter melting on a slice.... MMMMMMMMM......

Thursday, November 26, 2009

Naan Bread

I've been wanting to give some Naan a try for years... since long before I got brave and learned to make breads.... and each time I say that I say a quiet thank you to Lewis... whose blog really inspired me and then he even sent me some bread making books. What a guy! He has not been blogging since moving to Italy... probably because there is too much bread baking happening there.

Next time I make them...I think I'll add the dry ingredients to the wet instead of the way the recipe indicated...that way I will have a better handle on the dryness of things. The first time I make a recipe...I follow it to the letter and make notes... but, next time.... I make my own adjustments....

The flavour and texture turned out wonderful...but, I think it might just work better with a teensy bit less flour than they called for and be a bit easier to make it smoother... a smoother looking chunk of bread is all I want from this recipe......see how it is creased here and there? ...not like the picture in the book...which by the way is BREAD by Christine Ingram and Jennie Shapter ..... could be the weather...the elevation...whatever... but, next time..a bit less flour initially might just do it.


Naan Bread

2 cups unbleached white bread flour
1/2 tsp. salt
1 1/2 ounce fresh yeast (I used about 1 1/2 tsp active dry yeast)
4 TBSP lukewarm milk
1 TBSP vegetable oil
2 TBSP plain yogurt
1 egg
2 - 3 tablespoons melted ghee or butter; for brushing.

Sift flour and salt together into a large bowl. In smaller bowl, cream the yeast with the milk. Set aside for 15 minutes. (I just sprinkled my yeast on the milk, stirred it in.. ... it foamed up nicely after about 15 )...
Add the yeast mixture, oil, yogurt and egg to the flour and mix to a soft dough.
Turn out onto lightly floured surface and knead for about 10 minutes until smooth and elastic. (My dough initially seemed a bit dry to me, but eventually didn't feel too bad).. Place in a lightly oiled bowl, cover with lightly oiled plastic wrap and let rise, in warm place, for 45 minutes, or until double in bulk.

Preheat oven to 450F. Place baking sheet in oven to heat also. Turn dough out onto lightly floured surface .. punch down. Divide into 3 equal pieces and shape into balls. Cover two of the balls with oiled plastic wrap and roll out the third into a teardrop shape about 10 inches long, 5 inches wide and with a thickness of about 1/4 to 1/3 of an inch.

Place Naan on hot baking sheets and bake for 3 - 4 minutes or until puffed up.
Then place under hot broiler for a few seconds or until the top browns slightly.

Wrap Naan in a dish towel to keep warm while rolling out and cooking the remaining naan. Brush with melted ghee or butter and serve warm.

Makes 3 Naan.

Friday, October 16, 2009

World bread day......

world bread day 2009 - yes we bake.(last day of sumbission october 17)


Today is a special day.... World Bread Baking Day ..... here is the link to my easy recipe for my first bread.... and also Tuscan Peasant Bread... my second try.... Check out Zorra's .... and read more about the day and her bread and see other wonderful recipes and fun blogs........

If I can do it so can you.... I only began playing with yeast a couple of years ago after being too afraid (which is silly) to give it a try. I love baking ...why wouldn't I have tried bread years ago? Again..... silly me... now I'm even trying Artisan type breads. Find a recipe..give it a try and it turns out yummy....every one. There's nuthin' to this bread baking thing now that I'm onto it ... hahahha.... it's fun! My only regret? Why the heck didn't I start much sooner. There is nothing better than the lovely aroma of freshly baked bread right there in your own kitchen.