Showing posts with label bread baking. Show all posts

Friday, May 12, 2023

Basic White Bread


 Well, that's what they call it in the Kitchen Aid mixer booklet.  Usually in the bread world, 'basic' does not contain butter, sugar and milk...  this one does......

It is the recipe I began with many years ago when I finally decided to conquer my 'yeast phobia' and go for it.  Just bake bread. 

It was amazing to me how well it turned out.  We really enjoyed it; especially for toast.  Not as much for sandwiches as it is a bit crumby compared to the store bought slices that always stay together ( one wonders what they add to it to make that happen) ... but, nevertheless... I continued to make and enjoy it. 

Until sometime in the past year...when it began to turn out ...erm...well.......just not quite the same.....

It began to come out of the oven looking perfect...but, within 20 minutes.. began to get cracking and crazing on the surface .. you could hear it ... and, much as I have read that it is what some bakers are striving for... that baker is not me.   I want a crisp, lovely brown crust..that stays firm and smooth and an interior crumb that is soft and tight with no large gaps or air holes.  

A fellow baker (Philip, thanks again).  ... .. suggested baking it at a lower temperature ..and, that worked!!  Now it is staying uncrazed or crackled on the surface... but, of course not getting quite as brown on top and, now....it is sort of settling into a dimpled, softish crust after half and hour.  Arrrghhh!@# .. 

It is still great tasting bread... we love it for toast.. by itself with coffee.....or for under a poached egg... or with soups... but, what has changed or what am I doing different or ..is it the oven?  I do have a new oven but, have had it for a couple years now ..and, I'm sure it didn't all begin with that.  Although, maybe..... 

Anyway..now another fellow baker has offered to do some 'forensic testing' on my bread and the recipe.  So, without further ado....here is the recipe Kevin.... maybe you can come up with my solution ..or ...I could always just use a different recipe and get some bread with a nicer crust.... yes... why don't I just do that?  Not... I'm just stubborn enough to keep at it until I figure it out at the very least... then..  make a different recipe!

Basic White Bread

        1/2 cup    (125 ml)  milk
3 TBSP.   (45 ml)    granulated sugar
2 tsp.       (10 ml)   salt
3  TBSP.   (45 ml)   butter
2  Packets  active dry yeast (I use 1 TBSP yeast)
1  1/2 cups (375 ml) warm water (105 to 115F).  (40C - 45C) 
5 - 6 cups all purpose flour.  (1.25L to 1.5L)

    Combine milk, sugar, salt, and butter in small saucepan.  Heat over low heat until butter melts and sugar dissolves.  Cool to lukewarm.

    Dissolve yeast in warm water in bowl.  Add lukewarm milk mixture and 4 1/2  cups flour.  Mix on speed 2 for 1 minute.  Continuing on speed 2, add remaining flour, 1/2 cup at a time, until dough clings to hook and cleans sides of bowl.  Knead on speed 2 for 2 minutes longer, or until dough is smooth and elastic,  Dough will be slightly sticky to the touch.

    Place in greased bowl, turning to grease top.  Cover, let rise in warm place until doubled in bulk, about 1 hour.

    Punch dough down and divide in half.  Shape each half into a loaf and place in a greased 8.5 x 4 x 2.5 x 2.5 inch pan (21x12x 6 cm) loaf pan.  Cover, and let rise in warm place until doubled in bulk, about 1 hour.

    Bake at 400 F (200 C) for 30 minutes.  Remove from pans immediately and cool unwire racks. 


    NOTES:::::  ~~~~~~~~~~~~~~~~~~~~~~~~~~~~~~~~~~~~~~~~~~~~~~~~~~~~~~~~~~~~~~~~~

    I decided early on that 2 packets of yeast (which each contain 2 1/4 tsps. granules) ..was too much...so I only use 1 TBSP or a bit less.   

    I have tried less butter...  less sugar ...  (usually only toss in a dollop (which is probably close to 1 TBSP of butter.. only usually use 1 TBSP or less of sugar) ....  I've tried using only water and no milk... 

    Usually I use one cup or 1 1/2 cups of whole wheat flour along with the 3  or 3 1/2 cups of white flour for my initial addition of flour...and, add 1/2 cup and a second 1/2 cup of flour until I get the consistency I feel is good.  It usually ends up a bit less than 6 cups total....

    Sometimes I knead in the machine...sometimes I just turn it out and knead by hand.... 

    Nowadays I bake it at 350F instead of the 400F they call for. ...but, next bake I think I may try 375.. to get it a bit browner..or just leave it in longer...or...  well, who knows... using milk or a bit more sugar might get a browner crust..... I'm still shocked at how pale it stays just because I began to use a lower heat for baking.

    The oven shelf is on the second from the bottom position... there are several positions I can use, but the lowest is better for breads it seems..or the top browns more quickly that the bottom.

    I have two baking settings... one called Surround (which uses a fan and upper and lower heating elements)  ..the other just Bake, which is the one I have begun to use more regularly.   I don't use steam pans or spritz any moisture on the bread or in the oven. 


    Well, there you have it Kevin... all the pertinent details.  Maybe you can figure out something that will get me the lovely crisp crust and soft interior that I used to bake with ease all those years ago and which now.... seems to evade me......


Okay, it's end of day and I'm totally bummed with the results. ...  just going to use a different recipe from now on.

The dough seemed good... nice and supple and smooth...

Click on any pic and it will show larger....


It definitely got a bit over risen in the pans... I'm always hesitant to only leave it for less than an hour ..but, in this case... I should have turned on the stove at about 40 mins and it would have been a better thing.  It was cool in the kitchen at only 20C..but, the dough was warmer I guess.  I did check it and it was above Charlie's favourite of 25C ...it was closer to 27C.. but, I thought it would be okay as the room was cooler. 

I don't know what causes it to pull like this..only on one side always... it can't be under proofed... 

...because then... I got this.  A large bubble with a very thin membrane ...which I couldn't resist pushing in ... 


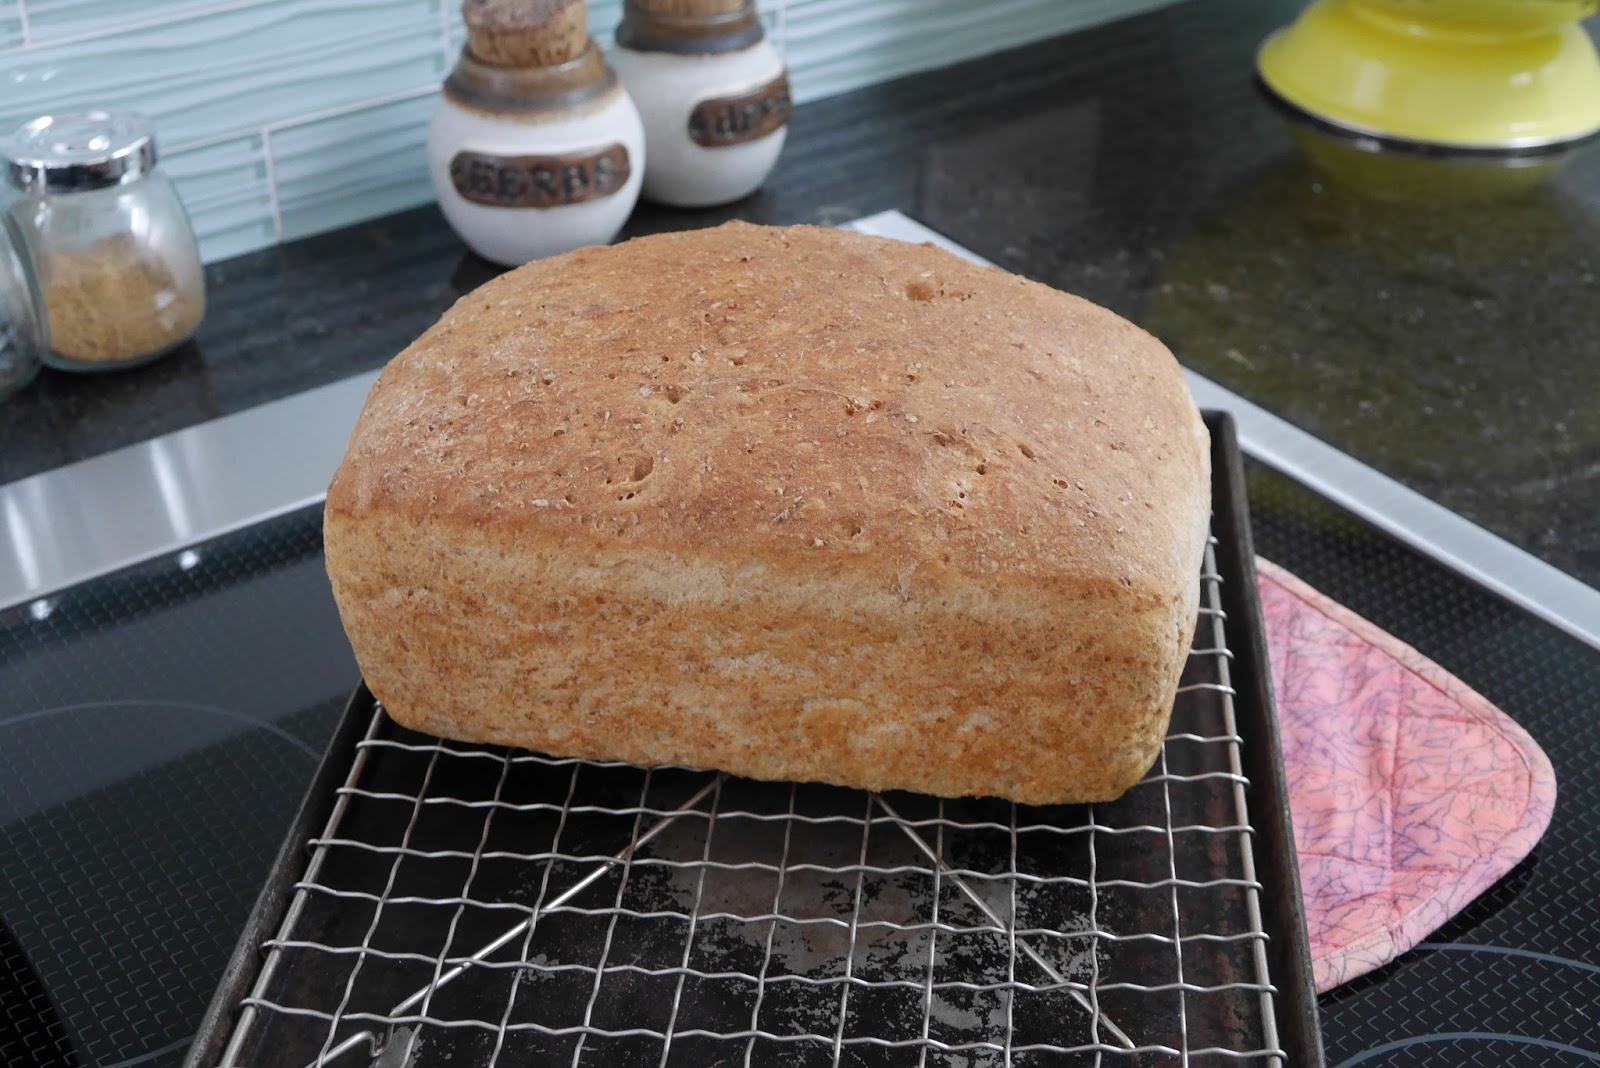
Th underside looks good... nice and golden....


A portion of the surface looks pretty darn good....


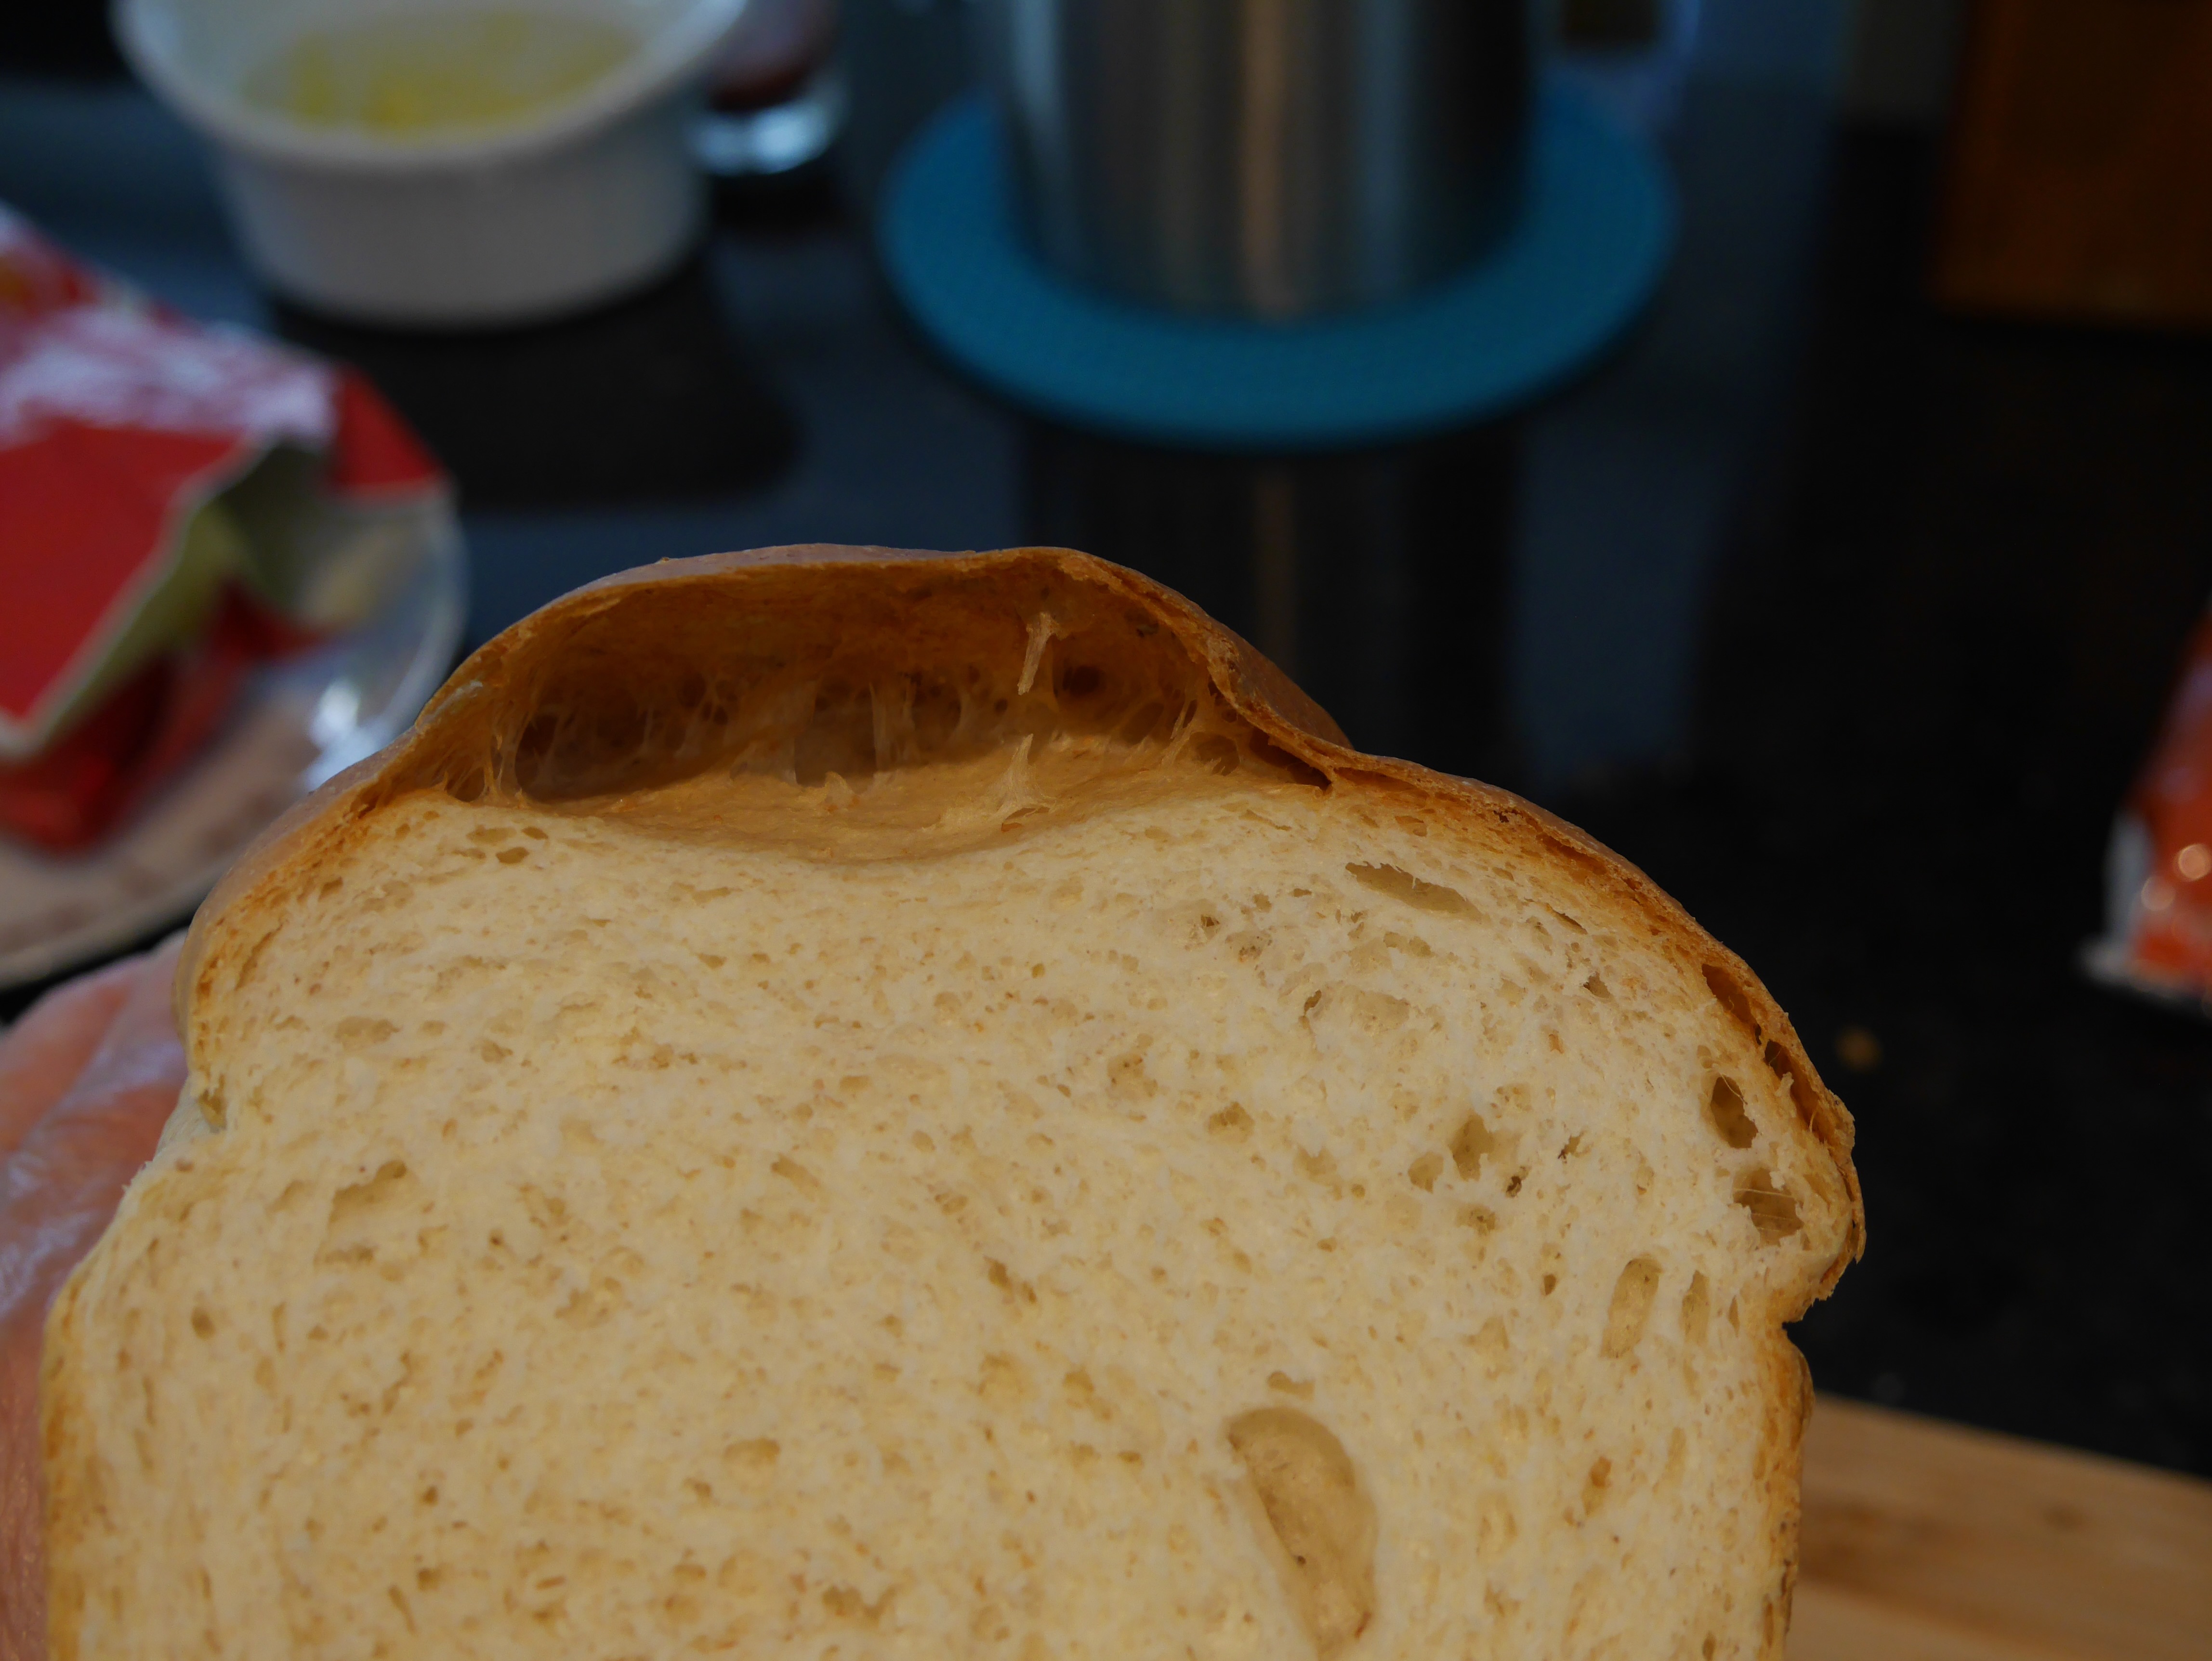
..but...once cooled ... and sliced ...look at this.  Another big bubble on the very top.


And, if you can see it ...the wrinkling or dimpling and softness I was talking about.  It may be just because it is more of an enriched dough with the butter, milk and sugar... but, who knows... 


    My husband had a slice with some butter and honey and declared it delicious.  I guess that's all that counts.... 


Thursday, June 27, 2019

My bread got "over riz" ...

Hahahhaha.....   I laughed my head off when I saw this about 3 hours after I put it into the bowl to rise... it was only supposed to do that for 1 to 1 and a 1/2 hours or so... but, things got busy and I forgot.  But, still.......


It pushed the plastic wrap and the towel on top out of the way and broke over the top of the bowl...my biggest bowl unless I step up to the big ol' metal bowl...

This particular recipe is one I have used for years.  But in the last two batches .... I have had to add lots more flour than usual to the 2 cups of water... even to get it to a stage where it is not really sticky... maybe because it has been really rainy or something?   We do know that breads are finicky that way... and by the time I weighed out the two loaves I discovered that they were in the 720 gram range versus the 560 to 580 gram version of all the times past.  This is silly.

They really were too big for the regular size loaf pans which are only 8 x 4 inches.  This time...I tried to sort of divvy them up into one of the regular size pans and one quite large pan which is 9 x 5.   It worked...sorta.... but, then, I was kind of waiting for the large one to rise a bit more and so the smaller one got "over riz" again..hahah.... and now I have one lop sided loaf and one good loaf.


See where the smaller one is poofed out on the side?  But, who cares??   Paul Hollywood is not judging my bread.  They taste really good as usual... and, if they don't fit in the toaster., too bad.  I'll just cut them in half.  Especially the BIG one... that one won't fit the toaster...

 They don't look that different in some photos and the big one doesn't even look that big ... I should have put it beside the toaster for better perspective.  Next time.


Tuesday, April 24, 2018

Alexandra's Mom's No Knead Peasant Bread (revisited)

A little over a year ago I posted about this amazing bread... nobody ever commented...but, I had hundreds of people who came to view the post.

Do you ever wonder why nobody comments?  Do you wonder, like me, if they ever try the recipe?   I wonder how they like the bread?  So many questions....

I make it all the time.  I love this bread.  I do it a bit differently now and thought I would show you a series of pics of my efforts.

The first few times I made it I used only white flour...now it is more like half and half whole wheat and white...with a good sprinkling of wheat bran tossed over it as well.  About 1/4 of a cup or so.

It is a very forgiving dough.. I have forgotten it in the microwave for a couple of hours...no problemo.

Anyway... check out Alexandra's blog to find out more about her Mom's bread.. and, please give it a try.  Also... she now has a book out.... in which the bread figures big time.  There is even a gluten free version that is pretty darn good.

https://alexandracooks.com/2012/11/07/my-mothers-peasant-bread-the-best-easiest-bread-you-will-ever-make/

Click on any pic to see it larger and get a better idea what I am talking about.

When first you pour over the foamed yeast and water you think....too much liquid.


Then, you mix a bit and think... oh, no... too little liquid!


Finally it all comes off the sides of the bowl and comes together beautifully and you sigh with relief.


I like to put mine in the microwave.  A warm and cozy spot.. almost like a proofing drawer.


An hour or so ...or even 3 hours later if you forget ...it looks like this... at least twice the size.


Fold it in on itself with a fork... scraping it all from the sides of the bowl towards the centre.


I roll mine into an elongated blob that is close to the size of my tin.


Turn it out into a 9 x 5 x 3 tin.


Let rise in a cool spot this time.  Looks like this after about 20 or so minutes.


Bake in 425F oven for 18 minutes, turn down to 375F and bake another 18 or so....


Looks like this... and, yes I slice it hot from the oven..slather it with butter and some honey.  YUM!


Friday, March 3, 2017

Alexandra's Mom's No Knead Peasant Bread

It's been two years since I did any posting on this blog... many's the time I had something great to show and tell, but, for whatever reason, it just didn't happen.

But this.......... this is too good not to share.

Alexandra's Kitchen.  I stumbled upon her blog while searching for something... forget exactly what it was now...but then, I noticed this on her sidebar.

Simple Peasant Bread as she calls it.  It's her Mom's recipe from when they were kids...  I'm always on the lookout for easy and tasty breads.  Looks like her Mom was way ahead of the 'modern' no knead breads everybody is always raving about.  So was most of Europe, but don't tell that to everybody who is now ruining their lovely expensive Creuset pots trying to bake no knead bread in a superheated oven.  I've been using several other versions over the years...but, this is the best so far.

A lovely, easy to make, tasty, crunchy-outside-soft-inside loaf, in about 2 hours.  Yes, it only takes a short while and there is no kneading or even touching the dough at all.  Alexandra made it, with videos included, on her blog; even with small children around .. years ago now..but, the 100s of positive comments attest to its' ease, its' flavour and to its' success.  People like me are just discovering her blog and her recipes ...and I will definitely be back to try some of her other goodies.  Like the chocolate cake recipe I also saw while there ....oh, yummmm.....

Anyway....she divides her dough into two blobs and bakes it in two Pyrex bowls...I didn't have two, so used my giant muffin pan for the second half of the dough ... it makes the cutest little loaves for giving quickly to neighbours so you don't eat all of the bread in one sitting... straight out of the oven.... which could happen.......believe it.

Here are some photos of my attempt... which I did exactly as she said to do on her recipe... and it worked perfectly.
Thanks so much Alexandra!!  and, of course, your Mom ...  who did it many times before ............


Dough after the first rise of one hour..


Second rise just sitting on the oven door where it was still warmish... 


After 15 minutes I moved it on top of the stove while I heated the oven.


              It rose to just the tops of the containers by the time I put it in the oven.

It got plenty of oven spring in the first few minutes of baking.


Soooo cute... big muffins of bread.


Good thing there are a few items for perspective...they could be pretty large loaves if you didn't know otherwise.


As you can see I had to cut and taste even if it was good and hot........... mmmmmmmmmm....oh, yeh..........


This is the little bit larger loaf from my 1 quart bowl.


I lost track of the actual baking time for the smaller muffin loaves..but, you can take them out when golden or leave them to brown a bit further ... probably mine were about 25 minutes by the time I decided to take them out and left the larger one for another 5 or so... I like them more blonde than dark.... but, that's just me.....

here is the recipe.. from her blog ...... she gives you plenty of info about how to mix the dough;  lift with the forks etc...  you should watch some of it before attempting it... it makes things so simple once you've seen it done.  Well, it sure did for me anyway.......  I'm what my sister calls "visual"... reading it doesn't always make it totally clear to me.  I like to "see the video" if you know what I mean...


Monday, May 19, 2014

Mountain Bread

...or Mountain Man Bread ...

My brother bakes it; sent me the recipe.  He's a true mountain man living in the middle of nowhere (in the mountains)  ... hunting, fishing and baking ... feeding the wildlife and taking lots of pictures.  He also makes a special orange loaf, and a mean cherry pie, let me tell ya... but, back to his bread....

If you use a 9 x 5 loaf pan it will hold the dough, but, it does make a gargantuan loaf... sometimes too big for my toaster.. so I cut the slices in half ...or bake them in smaller pans and get two small loaves instead of one huge loaf.  Your choice.  But, please give it a try!


Multigrain Bread

1 TBSP  (15 ml) granulated sugar
1 - 1 1/2 cups (375 ml)  warm water
1 pkg (2 1/2 tsp/11ml) active dry yeast
1  cup (250 ml)whole wheat flour
2  TBSP (25 ml)fancy molasses  ((I only use 1 TBSP))
2 TBSP (25ml) butter melted
1 tsp. (5 ml) salt
1/4 cup (50ml) shelled sunflower seeds
2  TBSP (25ml) flax seeds
2/3  cup (150 ml) rolled oats (not instant)
3 cups  (750 ml) all purpose flour (approx.)

In bowl, dissolve 1 tsp (5 ml) of sugar in 1/2 cup (125 ml) of the warm water; sprinkle in yeast.  Whisk in 1/4 cup (50ml) of the whole wheat flour; set in warm place til bubbly, about 10 minutes.

In large bowl, combine molasses, butter, salt and remaining sugar and warm water.  Sir in sunflower seeds, flaxseeds, yeast mixture and 1/2 cup (125 ml) of rolled oats.   Stir in remaining whole wheat flour and enough all purpose flour to make stiff dough.

Turn out onto lightly floured surface; knead until smooth and elastic, kneading in as much of remaining all purpose flour as necessary, about 10 minutes.

Place in large greased bowl, turning to grease all over.  Cover with plastic wrap or towel; let rise in warm draft free place until doubled in bulk, about 2 hours.

Punch down dough; turn out onto lightly floured surface.  With rolling pin, flatten into 11 x 8 inch rectangle; firmly roll up into log and pinch seam to seal.  Or, shape into loaf log with hands and fit into pan.  Cover and let rise until doubled in bulk, about 1 1/2 hours.

With tip of sharp knife, make 1/2 inch deep slash lengthwise down centre of loaf.  Brush top with water and sprinkle with remaining oats.   In conventional oven bake at 400F (200) for 30 minutes.

For convection oven bake in centre at 350F (180 C)about 40 minutes.   When done, bottom of loaf sounds hollow when tapped.

Remove from pan; let cool on rack.


Options:::::  If you are used to baking, you will find easier ways to do the mixing and also add and subtract seeds and nuts as you prefer.

 I usually make mine in my stand mixer.  So, I put some warm water and sprinkle yeast over it in the mixer bowl ... wait for yeast to froth (about 10 minutes) and then add other ingredients, beginning with the wet ingredients and then, the flours, nuts and seeds.   Run mixer with dough hook til dough clears sides of bowl and then, take the lump of still slightly sticky dough out and knead for some more minutes on floured surface adding a bit more flour til I get a silky and just non sticky mass..  then put in greased bowl for first rise.

I don't bother slashing the top or adding oats to it...they usually just fall off and make a mess on the oven bottom ... also, I only use one TBSP of molasses ..it is too much for my taste if I use the recommended two TBSP...

.... and, if I don't have enough sunflower seeds or no flax around... I just leave them out or add some more of the other .... it's a pretty forgiving loaf....and, very tasty.  Some day I'm going to try stuffing chunks of hard cheese inside of it....


Has a lovely rustic look to it.


It makes the best toast!


Thursday, February 21, 2013

Stromboli

I have no idea why it is called that.  Just a minute. Must check it out ... I'll go ask Professor Google and see if it is a regular name for this type of bread.


Oh, sorry...just ran off to check it out and Wiki says this about it. ....  And, as usual... the Americans are claiming they invented it.  Okay then.....

I found the recipe in one of my bread books.... and, added a few things they didn't ...subtracted a bit of the cheese... and now wish I had mixed it more like they suggested.   Next time.

I may have added a bit more flour than they asked for or mixed it a bit too much...either way.... I didn't like the firmness of the crust, although, the interior is lovely and soft.  And, in retrospect, wish it had more cheese and less olives.... again, next time.  The photo in my book looks softer and it seemed flatter ...

There are lots of recipes online if you would like to give it a try.  I won't be adding my own recipe here til I have attempted it a second time and appreciate the crust a bit more.   But, how about this? ... Why doesn't somebody else give a Stromboli a try and let me know if their recipe is better or ..much the same....  ??


Saturday, May 28, 2011

Broa..... or Portuguese Corn Bread ....

...or, at the very least...a super close second!! That's what I'm calling my third recipe of this yeasted corn bread I've tried since coming back from our Portugal holiday.  How do you like my cute little handpainted souvenir serving plate?
Probably won't taste that wonderful bread again 'til I go back, and even then...'til I find that very same market in the very same town and hopefully the very same person will have baked it!  As if, hey?  A girl can dream........


Meantime.......... I'll definitely continue to slightly tweak this particular recipe..because...so far, it is the best one I've tried ( the easiest too for that matter) and I'm convinced it would just need a few tiny changes to be right there!  You know how your taste buds remember things.... mine do anyway.... and I'd really like to replicate that wonderful flavour if possible.
I loved the colour of this loaf.... as yellow as bananas.....whereas some are greyish yellow.... or dull colours....


Maybe for you this could be a great cornbread for a first time effort ....and maybe it will be your new favourite ...


The Portuguese like to eat this bread with their favourite soup,  Caldo Verde, or, green soup.

Check out what Wiki has to say about the soup.  It's basic ingredients:  kale and potatoes.... but, as with all recipes... now has dozens of variations. Lots with their favourite sausage in it too ... Chorico..or Chorizo.  Google it for lots of info and recipes .... it's always amazing to me how many recipes there are for things I've previously never heard of.  And...now... I've already made several very tasty soups in the Caldo Verde style.

I'll post my own variation of Caldo Verde soon too..... but, for now.... Broa.  Funny how I remember the food words I learned in Portuguese isn't it?  ....  hahhaha.... now how to ask for the bathroom..... oh, yes..just a minute....actually... that seems universal in European countries...just ask for the WC and you will be fine...even if you can't speak a word of the language.

This recipe is from a wonderful breads book given to me by a blogger named Lewis...in a very amazing pay-it-forward that I offered to do on his blog a few years back.  I credit him with getting me started with bread baking.  Thanks so much again Lewis.  I wish you were still blogging.  Miss you and your great recipes and tips.


Broa

2   tsp. dry yeast
1/2  plus 2 TBSP lukewarm milk
3/4  cup lukewarm water
1 1/4  cup yellow cornmeal
2 1/4  cup bread flour, sifted  (I just used regular flour, unbleached... )
1 1/2  tsp. salt  (I only used 1 tsp.)
1  TBSP olive oil

Sprinkle the yeast into the milk in a bowl.  Let stand for 5 minutes; stir with a wooden spoon.  Add the water to the milk.  Mix the cornmeal, flour and salt in a large bowl.  Make a well in the center and pour in the dissolved yeast and olive oil.

Mix in the flour to form a firm and moist, but not sticky dough that leaves the sides of the bowl.

Turn the dough out onto a lightly floured work surface.  Knead the dough until smooth and elastic, about 10 minutes.  Put the dough in a clean bowl and cover with a dish towel.  Let rise until doubled in size, about 1 1/2 hours.  Punch down, then let rest for 10 minutes.

Shape into a round loaf.  (If you have trouble doing this...just Google how to do it...there are several videos to see)   Place on a baking sheet sprinkled with cornmeal (just a very light sprinkling is fine) and cover with a dish towel.  Proof until doubled in size, about 1 hour.

Dust the loaf with cornmeal. (I omit this step now...it just falls off later with I am cutting and it is messy).... Bake in a preheated oven for 45 minutes, until golden and hollow sounding when tapped underneath.  Cool on a wire rack.

::: I just used regular flour because I didn't have any bread flour on hand.  Also...I added 3 TBSP of sugar as I was trying to get a slightly sweet taste that I remember a certain loaf having...... still not enough really...but, almost....
Also....I mixed my ingredients in my stand mixer because I am suffering with a rib problem... can't do anything like mixing or kneading at the moment.  And...one more thing...I left it a few extra minutes...because I definitely wanted my crust to be darker than golden.  This was perfect for me.

We had it with a great Caldo Verde....I like my dipping breads toasted...it is YUM toasted.....I sure hope you give it a try.